Authorize.Net provides merchant account services in the United States. When you integrate with the Authorize.Net merchant gateway, you are able to process payments through any method (order forms, shopping cart, or manual orders). It will also handle auto-charges for subscription or payment plans. When a customer submits payment through the Authorize.Net gateway, they never leave your company website - Authorize.Net simply processes payments on the back end.
Once your Authorize.Net account is approved and activated, you will need to integrate it with Keap.
Note: If you are processing international payments, you will need to activate this option on your Authorize.Net account through Account > Address Verification Services. Un-check the G, U and S fields and then save the changes.
- Go to E-Commerce > E-Commerce Setup

- Click on Payment processing

- Check the box next to the credit card icons and click the "Add new"

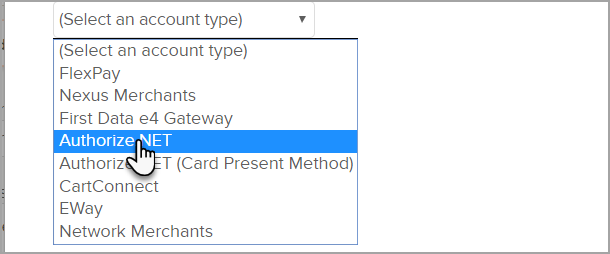
- Select Authorize.Net from the Merchant Account drop-down.


Authorize.NET Account Information
Fill in the Authorize.NET Account Information and Save your changes. Some of this information must be obtained from Authorize.net. (Visit the Authorize.Net Support Center.)
- Name: The name should be short and descriptive. It is used to identify this merchant account in various lists throughout Keap (e.g. Authorize.Net A.)
- Login ID: This is the API Login ID from Authorize.net. To get this ID.
- Log into your Authorize.Net account.
- Select Security Settings from the Settings dropdown menu.
- Click on API Login ID and Transaction Key.
- Copy the API Login ID and paste it into the Keap merchant account settings.
- Transaction Key: You must generate the transaction key through your Authorize.Net account.
- Test Mode: Set this to Test Mode when you are testing the integration. Come back and set it to Live Mode before you begin processing orders through this account. There is also a Test Mode in Authorize.Net that must be disabled before you can successfully process real transactions.
- Send Transaction Email: Set this to Yes if you want to receive a transaction email from Authorize.Net for each purchase in addition to the order notifications Keap sends to you.
- Click Save when finished
- Check the Credit Card check box again.
- Select your new Authorize.Net merchant account from the drop-down and save your changes.
Helpful Authorize.Net Links:
- Useful links when a customer transaction fails.
- Response Codes look up (type the error code into the search field)
- Table of common decline reasons
- Error 11: A duplicate transaction has been submitted (response code 11)
- Error 13: The merchant login ID or password is invalid or the account is inactive. (response code 13)
- Error 66: This transaction cannot be accepted for processing. (response code 66)
- Error 98: This transaction cannot be accepted. (response code 98)
- Error 123: This account has not been given the permissions required for this request. (response code 123)
- How Do I Look up Authorize.Net Api Response Codes?
- Response Codes look up (type the error code into the search field)