A broadcast message is a single message that is sent to an entire list of people at the same time. It can be scheduled to go out on a specific date and time, but the schedule is the same for everyone. A broadcast is generally the best option when you need to send the same message to everyone at the same time (e.g., a monthly email newsletter). It is also the best option for sending messages that require frequent updates.
Pro-Tip! Once a broadcast email is scheduled, it can no longer be edited - it can only be stopped. If you need to make changes, stop the batch by going to Marketing > Emails & Broadcasts. If your broadcast is not listed at the bottom of the page, click the New Search button, then click the green Search button to pull up all broadcasts.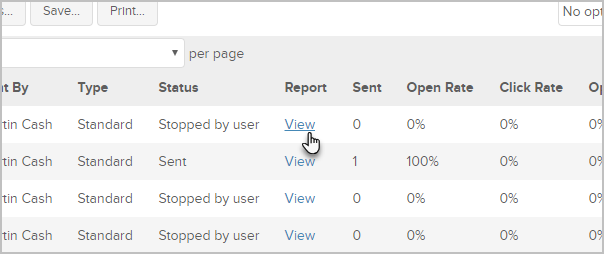
Pro-Tip! Email marketing is permission-based marketing. Make sure you have permission before you send a broadcast. Review the Keap Acceptable Use Policy.
- Go to Marketing > Email Broadcasts

- Click Get Started

- Choose your template

You can choose from:- Gallery: The Gallery contains several starter templates that you can use. Just hover over the template icon and click the "eye" icon to preview the template, or click Use Template to start customizing it.
- Previously Sent: This section contains a list of the most recent email broadcasts that you've sent. Hover over the template and click Use as Draft to start customizing it. You can also click the Save icon to save the template to the "My Templates" area.
- Drafts: When you are customizing an email template and click the Save & Exit button, the email will be saved as a draft so that you can come back to it later.
- My Templates: To save an email template to the "My Templates" area, click on Previously Sent, hover over the email template and click the Save icon. To save a template while in the campaign builder, click the Actions drop-down while customizing the template and select, Save to My Templates.
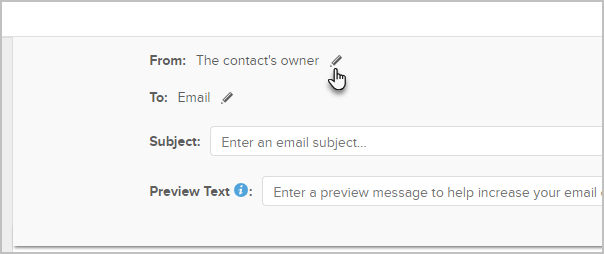
- To and From addresses: By default, the From email address will be the email address of the Owner of the contact record. This can be changed by clicking the pencil icon and either selecting another user, or adding a new email address. By default, the To address will be the main email address that is present on the contact record page. You can change this by clicking the pencil icon and choosing another email address merge field.


If you send emails through Keap using a Yahoo, AOL! or Gmail email address, there is a high chance that your email will be rejected because it was sent from Keap and not the actual provider. Please note this concept is not specific to Keap. This impacts anyone using a third-party email service provider or service that sends email on your behalf. To increase your email deliverability rate, we recommend that you use a custom email of your private domain. Click here to learn more.
- Choose the Email Broadcast recipients. Click inside the search box to find an existing tagged list or saved search. You can also click the New Search link to select a new list based on contact and custom fields. Click the Recipient options link if you need to change the default "To" email address.

- Enter a Subject Line

Pro-Tip! You can personalize the subject line by merging in the recipient's contact details. For example, if you want the subject line to call out their first name, click inside the subject line text box and click the Merge button > Contact Fields (most common) > First Name.

Customize the Email (Design View)
Pro-Tip! Your work is auto-saved every 30 seconds
In Design View, you can style various attributes of the email.
- Heading 1 Style: This allows you to configure the font, color and size of any text in the template that is formatted as "Heading 1". You can specify text as "Heading 1" by highlighting some text and choosing Heading 1 from the drop-down.
- Heading 2 Style: This allows you to configure the font, color and size of any text in the template that is formatted as "Heading 2". You can specify text as "Heading 2" by highlighting some text and choosing Heading 2 from the drop-down.
- Normal Text: This allows you to configure the font, color and size of any text in the template that is formatted as "Normal Text". You can specify text as "Normal Text" by highlighting some text and choosing Normal Text from the drop-down.
- Hyperlink Style: This allows you to format the color of hyperlinks in your email.
- Email Background Color: Changes the background color of the email.
- Email Position: You can toggle the position to left-justified (this is more typical when creating a personal, "hand written" email style) or centered for a more professional look.
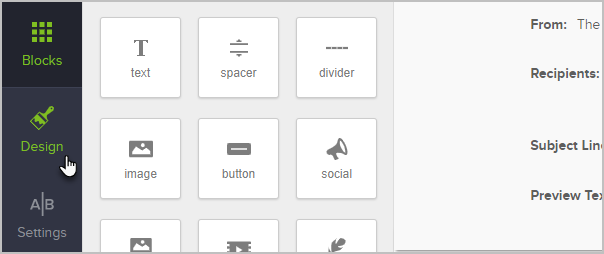
Customize the Email (Blocks)
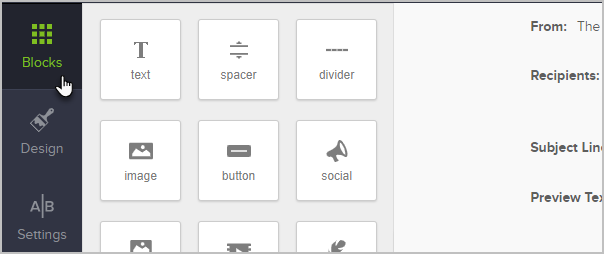
Click and drag blocks into your email to add new elements. To modify a block, select it and use the configuration panel on the left to make changes. For a Text block, just click inside the block and start typing.
- Text: Adds the most basic block for holding text.
- Spacer: Allows you modify the spacing between blocks (both verticle and horizontal).
- Divider: Adds a divider line across the width of the email.
- Image: Adds an image. You can choose an image from your image library, upload a new image, or link to an image on the web. Image files must be under 10mb! We recommend using .JPG, .GIF or .PNG file types as they are widely supported in all email clients. Images will scale to a max of 600px wide, which is the max width of an email built with the Email Builder.
- Button: Adds a button on the email. The button can be a link to a page on your website, or you can send them to web forms, landing pages, etc...
- URL: Sends them to the web page of your choice.
- Email Address: This is a "mailto" link which opens the recipients default email client when they click on it.
- Phone Number: Adds a phone number link which can be interacted with on a mobile device.
- File Download: Adds a download link from your filebox. You can also uplaod a new file.
- Web Form: Choose from a list of Web Forms that you have created. When the recipient clicks the button, they will be redirected to the form.
- Landing Page: Choose from a list of Landing Pages that you have created. When the recipient clicks the button, they will be redirected to the landing page.
- Social: Call out your social media channels with this block: Facebook, Twitter, LinkedIn, YouTube, Google+, Pinterest, and Snapchat.
- Group: This block adds an image, text, and a button all in one block.
- Video: Embeds a linked video thumbnail compatible with Wistia, Vimeo and YouTube. In order to embed a thumbnail, you must ensure you are linking to a public video. Private videos will not properly display a thumbnail.
- Signature: Merges the signature from your user profile.
- HTML: This block allows you to injecti custom HTML into the email.
Important Note! Using custom HTML in responsive emails could impact the way your email displays on different devices. Please test all emails before sending them to your entire customer list.
Preview and Test your email

Click the Test button to send yourself an email, or just click the Preview button to see how the email will look in most email clients and mobile devices.
- (Optional) Click Save and Exit to save this email in the Drafts area so you can come back and finish it later

- Click Review and Send to View the Email Broadcast Checklist

Send with Confidence! The Email Broadcast Checklist will scan your email for errors and suggestions.
Note: The system will remove any duplicate email addresses prior to sending and give you a notification telling you they have been removed.
When you are ready send, choose:- Send at the best time today
- Send Now: Starts sending the email immediately
- Schedule to Send Later: You can schedule the email based on your time zone or the time zone that is on the customer's contact record.


Modify scheduled broadcasts
You can stop any scheduled broadcast from being sent by following these steps:
- Locate your scheduled broadcast and click View in the Report column
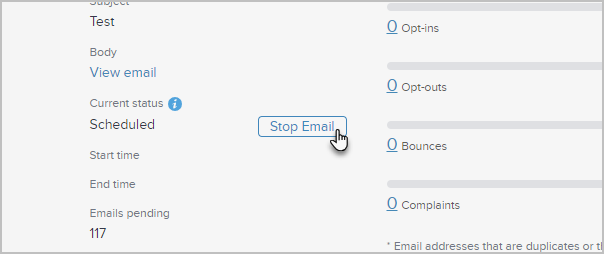
- Click the Stop Email button


To resume a schedule broadcast that was previously stopped, navigate to the broadcast's Report page and click the Restart Email button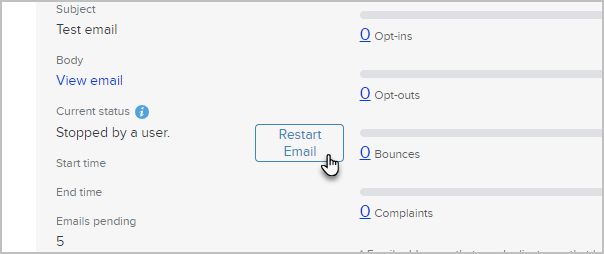
Keap Academy
 For more on this topic, check out this training from Keap Academy. Learn at your own-pace as experts walkthrough the set up and application of these features with context and strategic insight.