Please Note! We recommend using the online Strategy Guide to source your campaigns. The Strategy Guide is kept up-to-date with the latest campaigns. This campaign may contain legacy content (e.g, legacy emails, legacy landing pages, etc...)
This article provides instructions for launching the Dynamic Lead Nurture campaign that you can install for free from the Keap Marketplace.
Install the Dynamic Lead Nurture campaign from its Marketplace listing
Add Educational Resources to Emails
The email design and layout are pre-defined upon install. All you have to do is put the specific educational resources in the two emails and write brief descriptions.
- Double click the Dynamic Lead Nurture sequence
- Double click the Dynamic Lead Nurture #1 email
- Edit the email content so it is linking to two different educational resources and provides some context into why a lead might need this resource
- In the upper right of the page, click on Draft to mark the email as Ready; in the upper left of the page click Back to Sequence
- Repeat steps 2 through 4 for Dynamic Lead Nurture #2 email
- In the upper right of the page, click on Draft to mark the sequence as Ready; in the upper left of the page click Back to Campaign
Double Check Link Click Goals
Out of the box, this campaign is automatically tracking the resource links in the nurture emails. However, now that you've edited the emails, you want to double check that all links are still being tracked.
- Double click the View Resource 1 link click goal
- Going down the list of emails on the left of the page, click every link to the first resource in both emails; you’ll know you did it right when the link has a green check which means the system will be looking for clicks on that specific link.
- In the upper left of the page, click Back to Campaign
- Repeat steps 1 to 3 for the View Resource 2 link click goal; make sure you are tracking the second resource's links this time around.
Assign the Follow Up Task
The last setup step is to choose who gets the follow-up task when someone requests a conversation.
- Double click on the Task to Follow Up sequence
- Double click on the Task to Follow Up task
- Select a user from the Assign to (backup) drop-down
- In the Notify these users section, select the same user so they can receive an email notification whenever someone bubbles up
- In the upper right of the page, click Draft to change the task to the Ready status
- Click on Back to Sequence in the upper left of the page
- In the upper right of the page, click Draft to mark the sequence itself as Ready
- Click Back to Campaign in the upper left of the page
Publish the Campaign
All items on this campaign should be light green-greyed out (like the Start Dynamic Lead Nurture goal) which means we can safely Publish the campaign so it can be used.
- Click the Publish button in the upper right.
- Click the Publish button at the bottom of this list to publish the campaign.
Update Existing Sales Process
This campaign was designed to work as an enhancement to your existing sales process. Once a lead has made it to a certain point in your automated follow up, the campaign you just setup can be triggered automatically; all you have to do is apply this campaign's Start tag. For example, if you are offering a free lead magnet that drives towards a sale, you could trigger this dynamic lead nurture after they have received all sales emails but not made a purchase. You could also start this nurture immediately upon new lead capture if you don't have anything else automated happening to a new lead.
- Go into the campaign that contains your existing sales process OR lead capture
- Double click into the sequence where you want leads to start this dynamic nurture
- Using the Process menu on the right of the page, drag in a new Tag step and make sure it is connected to the automation flow
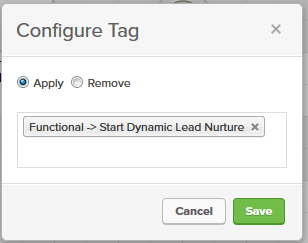
- Update the Tag step to apply the Functional -> Start Dynamic Lead Nurture tag; click Save
- In the upper left of the page, click Back to Sequence
- In the upper right of the page, click the Publish button
- Click the Publish button at the bottom of this list to publish the updates to this campaign
Now, the next time a lead makes it to this part in your sales process, this dynamic nurture campaign will automatically start.
