Pro-Tip!
Click here to know what to do if you are changing an existing merchant account!
Choose a merchant account
Sign up now for WePay or choose from one of the alternative merchant account offerings. You can also use PayPal Express Checkout but there will be some limitations discussed here.
Set up your products
- Learn how to set up a one-time purchase product or a recurring subscription product.
- Import your existing products or subscriptions.
- Add product options like size and color.
- Learn all about product images
- Organize your products and subscriptions with product categories.
- Manage product inventory to automate "Sold Out" messaging and learn how to adjust inventory manually
- Create Product Interest Bundles which are links that automatically fill a shopping cart with the items and quantity that you configure.
Configure your E-Commerce settings
Review your E-Commerce settings (E-Commerce > Settings). There are some very important settings here!
Product Settings
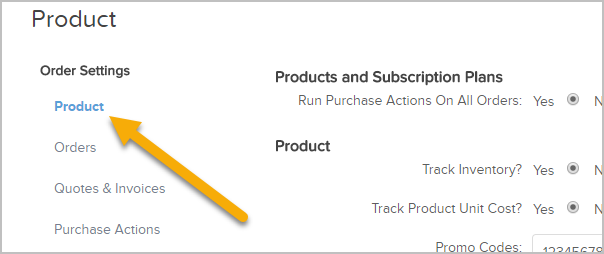
- Run Purchase Actions On All Orders - This setting enforces the Billing Automation rules (that you will learn how to set up later) to run not only on shopping cart and order form orders, but for manual orders too. It is recommended to enable this feature, Yes.
- Track Inventory - It is recommended to turn this on so you will automatically have a "Sold Out" notice on your order form or shopping cart when you inventory is depleted.
- Promo Codes - It is suggested not to manage these here, but to go to E-Commerce > Promotions instead.
Order Settings
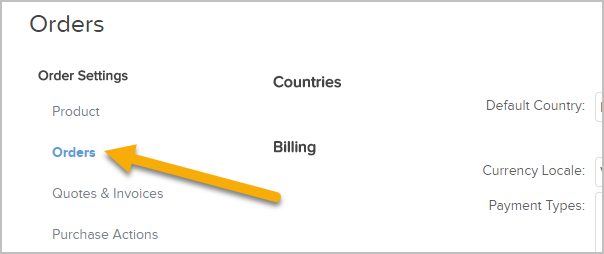
These are the most common settings. You can click here to see a full list of setting descriptions of every setting.
- Default Autocharge - Make sure to set this to Yes in order to autocharge recurring subscriptions and payment plans.
- Default Charge Tax - Enable this to apply Sales Tax automatically to an order.
- Default Merchant Account - Be sure to set this as the merchant account you set up previously. This will simply set your default merchant account on manual orders, and when you are building order forms.
- Default Max Retries - The default setting is 3, meaning that after 3 consecutively failed autocharge attempts, Keap will no longer try to process a payment on a particular order. It is typically not necessary to change this.
- Number of Days Between Retries - Building on the previous Default Max Retries setting, this is the number of days between each retry attempt. The default setting is 2, either 1 or 2 is typical here.
- Email receipts/invoices upon successful payment? You'll learn how to set up receipts further down this article. Make sure to enable this option to automatically email your customer a receipt.
- Reset failed autocharge attempt counters when Credit Card changes? It is recommended to turn this option on. This will reset the Default Max Retry attempts when a customer updates their credit card.
Credit card settings
Make sure to take a look at these settings:
- CC Types - These are the cards that will be available for your customers to choose from when entering their payment information on order forms and on the shopping cart. So if you don't want to offer American Express, you can just delete that entry and it won't be an option your customer can choose from when selecting which credit card to use. This will come in handy if you prefer not to allow a certain card due to higher fees or any other reason.
- Allow UK Maestro Cards? This simply adds Maestro as an entry in the CC Types.
Update credit card page header
This is a powerful feature; however it does have a limitation that you need to be aware of. You can only send customers to the "Update Your Credit Card" page from an automated email that is part of billing automation trigger (there is a dedicated section to billing automation below that will explain this more clearly). Max Classic does not natively have a "Billing Portal" where your customers can sign in at any time and update their credit card information. They can only update their credit card information by clicking on one of these links. However, there are robust membership add-ons built by our Partners that solve this problem. If you decide that you need a robust billing portal with the added benefit of having a fully-functional membership website, check out these popular offerings or ask on the Community what other customers like you enjoy using.
With that out of the way, the Header, Body, and Footer section can all be modified here. It's suggested that you use the same branding assets that you use on your website and emails so that your customer will trust the page and not be put off by a completely different looking page to enter their payment information.
Sales tax
Follow these instructions to enable sales tax and to configure tax per product. Note that if you need to charge sales in the shopping cart, there is a separate setting that needs to be enabled.
Set up invoices, quotes, and receipts

- It's easy to get quotes, invoices and receipts set up. Just go to E-Commerce > Settings > Quotes & Invoices.
- From here, you will want to make sure that Enable payment collection on Invoices is set to Yes. This will allow you to send good-looking, mobile-responsive quotes and invoices to your customer so that they can pay online.
- Continue configuring your quotes, invoices and receipts. Note the See Example link next to each section to preview the document.
Billing automation & purchase actions
Leverage this powerful feature to create Failed Auto-charge Automation, Credit Card Expiry Automation and much more.
Payment plans
Offer your customers payment plans that better meet their spending budget. You can define the number of installments and number of days between charges.