Please Note! We recommend using the online Strategy Guide to source your campaigns. The Strategy Guide is kept up-to-date with the latest campaigns. This campaign may contain legacy content (e.g, legacy emails, legacy landing pages, etc...)
This article provides instructions for launching the Newsletter Sign Up & Preference Center campaign that you can download for free from the Keap Marketplace.
This campaign contains a sign up web form that adds someone to your newsletter list once they confirm their email. It also contains a preference center that can be linked to from within any newsletter that gets sent out.
Download the Newsletter Sign Up & Preference Center campaign from the Marketplace
Publish the CAMPAIGN
All items on this campaign are 100% configured upon install which means we can safely Publish the campaign so it can be used.
- Click the Publish button in the upper right.
- Click the Publish button at the bottom of this list to publish the campaign.
Put Newsletter Sign Up Form on Your Site*
Your newsletter sign up form is now is ready to go! You just need to grab the form's web code and put it on your site.
* If you already have a Keap-based newsletter sign up form on your website, skip to the next section- After the publish is finished, in the upper left of the page just below the Back to List button, click on the Edit tab .
- Double click on the Newsletter Sign Up WEB FORM goal
- After the form opens, click on the Code tab towards the top middle of the page.
- In the Do It Yourself section, copy the Javascript Snippet code; this is the actual code for the form itself.
- Publish this form code on a page (or pages) of your website. Your website visitors now have a way to quickly and easily join your newsletter list!
Update Existing Newsletter Sign Up Form(s) on Your Site*
For the preference center to work, you segment your newsletter list using a custom Drop-down field (this is installed with the campaign); historically Max Classic users have segmented their newsletter list using a Tag. You will not be making any changes to your current newsletter sign up form, you will only be making changes to the existing automation on the back-end. In the next section, you will migrate your existing newsletter list from Tags to this new custom field.
* If you installed the newsletter sign up form on your website using the previous section, skip to the next section- Go into the campaign that contains the existing newsletter sign up form
- Double click into the sequence where the existing newsletter Tag gets applied; this should be the sequence connected after the existing sign up web form goal
- Double click into the Tag step which is applying the existing newsletter tag
- Next to the tag name, click the X to remove it from the step configuration
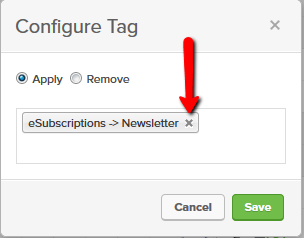
- Update the Tag step to apply the Functional -> Add to Main Newsletter Confirmation tag; click Save

- In the upper left of the page, click Back to Sequence
- In the upper right of the page, click the Publish button
- Click the Publish button at the bottom of this list to publish the updates to this campaign
- Repeat steps 1-8 for each instance of your newsletter sign up forms, if applicable
Migrate Your Existing Newsletter Segmentation*
Now that all newsletter sign ups will be using the custom Dropdown field to segment (instead of a Tag), you have to find all existing contacts with that tag, update the dropdown field on their Contact records and then delete the old newsletter tag.
* If you do not have your newsletter list segmented by Tag already, you can skip to the next section- Do a contact search for people with your existing newsletter Tag
- When you have your list of contacts, in the upper left of the results, click the Actions dropdown and select Mass Update Contacts
- In the list of contact fields, next to the "Main Newsletter" field (which installs with the campaign), check the box and select Yes
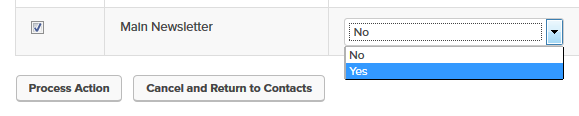
- At the bottom of the page, click Process Action
- Once the action has completed, hover over the main navigation and, in the CRM column, click on Settings at the bottom
- In the left menu, click on Tags
- Find the old newsletter tag and click into it
- At the bottom of the page click Delete this Tag and then click Ok to confirm.
Before deleting the Tag, verify the Tag is not being used in any other automation (campaign decision diamonds, lead scoring, etc.). If so, you'll need to update those automation pieces to use the new custom field instead before deleting the Tag.
ADD A LINK TO EMAIL PREFERENCES IN YOUR NEWSLETTERS
Moving forward, in the footer of each newsletter, you'll want to include a link to the preferences center.
- When configuring an email link, select "Hosted Web Form" from the drop-down and find the preferences form

- When configuring an email link, select "Hosted Web Form" from the drop-down and find the preferences form


If you have a newsletter template that you use as a starting point each time, save yourself time by adding this preferences link to your newsletter template